CuteHotspot. Wi-Fi Hotspot Software
Documentation
Quick Start
This section helps you start working in CuteHotspot in a few minutes.
1. Configure your network
(Step-by-step simple Wi-Fi billing setup guide)
Install CuteHotspot on your Internet gateway computer. The gateway handles all network connections from your customer terminals.
In order to setup such a gateway, you should install two network cards on your server computer, the first card connected to your ISP (ADSL, cable, etc.), the second one connected to your customer terminals network and setup Windows Internet Connection Sharing between them.

2. Create pre-paid tickets
Create pre-paid tickets (time codes) which you sell to your customers. A ticket contains its current balance, login and password.
Open the tickets screen (main menu > Setup > Tickets), press the "New" button, specify tickets minutes, price and the number of tickets to create:

3. Restart server computer
Restart your server computer to apply the changes.
4. Sell tickets
Once a customer comes to your shop, hotel, club, etc. and want to connect to your Wi-Fi billing system, he has to purchase a ticket which he then use to login.
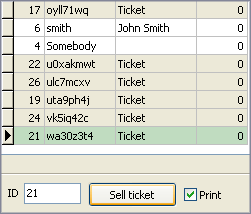
Select a ticket in the list (or enter the ticket ID) and press the "Sell" button.
You can print a number of tickets in bulk from the ticket screen (main menu > Setup > Tickets), put them in your cash drawer and enter the ticket ID on the main screen when you sell it to a customer.

5. Log in
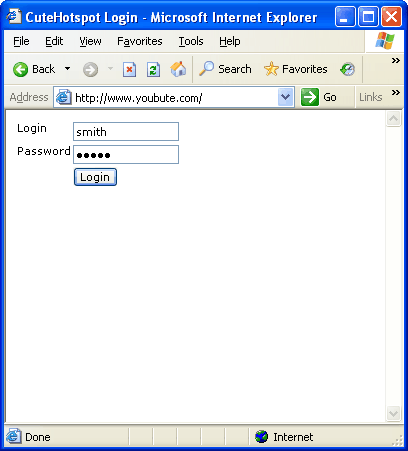
A customer opens a website from his wireless terminal and CuteHotspot redirects him to the login page if his billing session hasn't been started yet. The customer use a purchased ticket to log in.

6. Log off
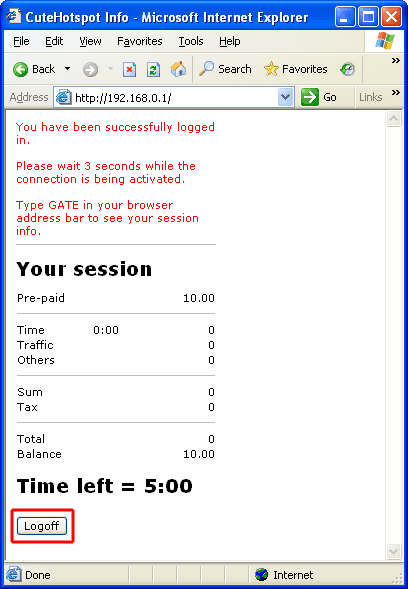
A customer presses the "Logoff" button on his session info page to stop the session.

CuteHotspot. Friendly Hotspot Software
Copyright © 2008-2012 TrueCafe, Ltd.
All rights reserved.
